Are you wondering how to create a photography website, but you’re not quite sure how to get started? I have helped many entrepreneurs get their websites set up without stressing out over design or tech. In this article, you will learn how to make a photography website on WordPress step by step.
I have found WordPress to be the best website builder for photographers looking to make a photography website. It is entirely customizable, mobile responsive, and SEO ready out of the box. When paired with a good web host and quality WordPress theme, it is a great choice even for beginners on a budget.
- How To Create A Photography Website In WordPress
- Step 1: Choose a Domain Name
- Here's an interactive tutorial
- Step 2: Set Up Web Hosting
- Step 3: Choose and Install a WordPress Theme
- Step 4: Import Your Photography Site with Starter Templates
- Step 5: Customize your Photography Website
- Step 6: Edit your Website Pages
- Step 7: Launch Your Photography Website (Go Live!)
- Step 8: Upgrade Your Photography Website with Plugins (Optional)
- Related Questions
In this article, you will learn how to create a photography website in WordPress in just 8 steps (even if you’re a beginner with no tech or design skills). Let’s get started!
How To Create A Photography Website In WordPress
With the right tools, anyone can build a website using WordPress. However, if you would prefer to skip these steps and have me do all of the work for you, get in touch!
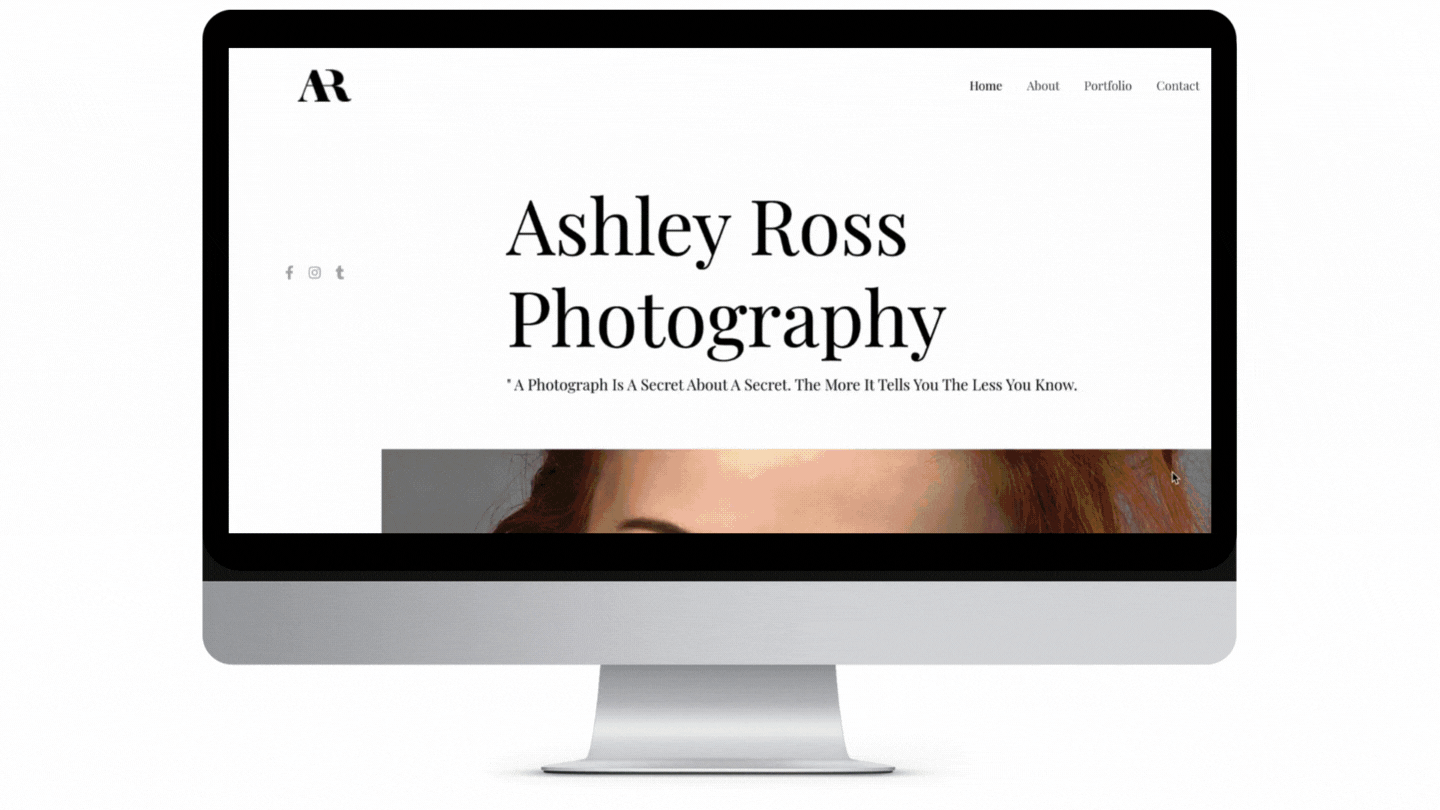
Here is a look at the photography website that we are going to build in this WordPress tutorial:
Step 1: Choose a Domain Name
The first step to build your photography website is to choose a domain name. Your domain name is the URL address of your website. For example, youtube.com.
Choosing a domain name for your photography website can be a lot of fun! It can also be stressful, especially if your favorite .com is already taken. For this reason, I have put together some helpful tips below.
5 Tips to Help Pick a Domain Name for Your Photography Website:
- Use your name or the name of your photography business.
- Include the keyword “photo” or “photography”.
- Choose a domain name that is simple and easy to remember.
- Avoid hyphens or numbers if possible.
- Purchase the .com domain extension.
RELATED: In case you get stuck, you might like this article How to Choose a Domain Name for your Website.
Once you have a list of potential domain names, go to GoDaddy (affiliate link coupon code) to find out what is available and get it registered.
How To Register Your Domain Name On GoDaddy:
You will need to register your domain name with a registrar in order to use it. Click START in the interactive tutorial below to walk through the steps to register your domain name with GoDaddy.
Here’s an interactive tutorial
** Best experienced in Full Screen (click the icon in the top right corner before you begin) **
- Go to GoDaddy.com and Type the domain you want in the domain name search bar. Click Search Domain.
- If your domain name is available. Click Continue to Cart.
- Choose how to protect your domain. I like to add Full Domain Protection for $9.99. Click Continue to Cart again.
- Choose the number of years to register your domain from the drop down. Click I’m Ready to Pay.
- Review the items in your cart. Click I’m Ready to Pay.
- On the next screen, click Sign In to complete checkout and that’s it. You’re done.
Now you are ready to move on to the next step which is setting up your web hosting.
Step 2: Set Up Web Hosting
A quality web host is also required. You use it to store your website’s files so that users can access your site live on the internet.
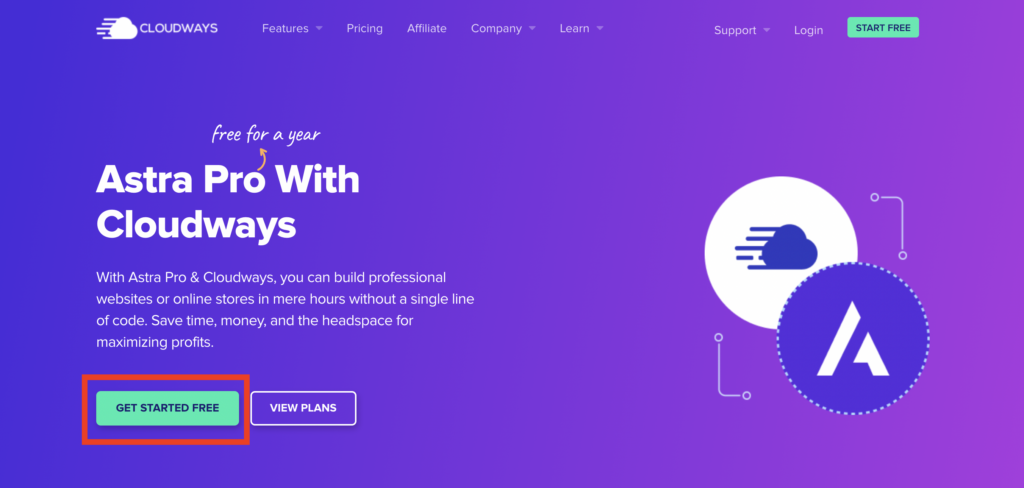
Cloudways is my favorite web host for photographers looking for a reliable, fast and secure Managed WordPress Hosting solution. Plans start as low as $12 per month and now include Astra PRO free for a year.
How to Install WordPress on Cloudways:
1. Create a Cloudways account. Click the link found in this article to get Astra PRO free for a year. (We will be using Astra in the next step!) Click START FREE TRIAL:
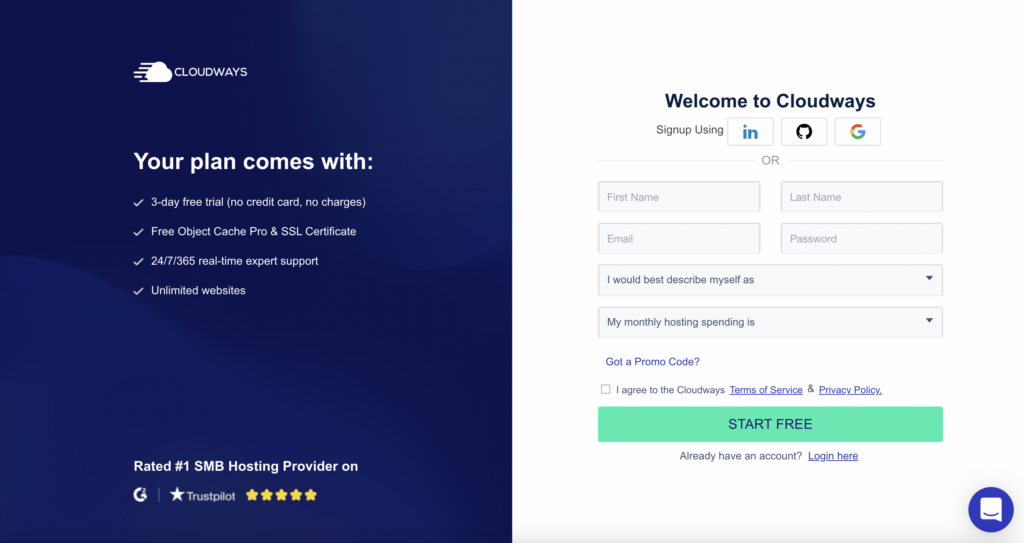
Enter your name, email and password on the Cloudways registration page to create an account:
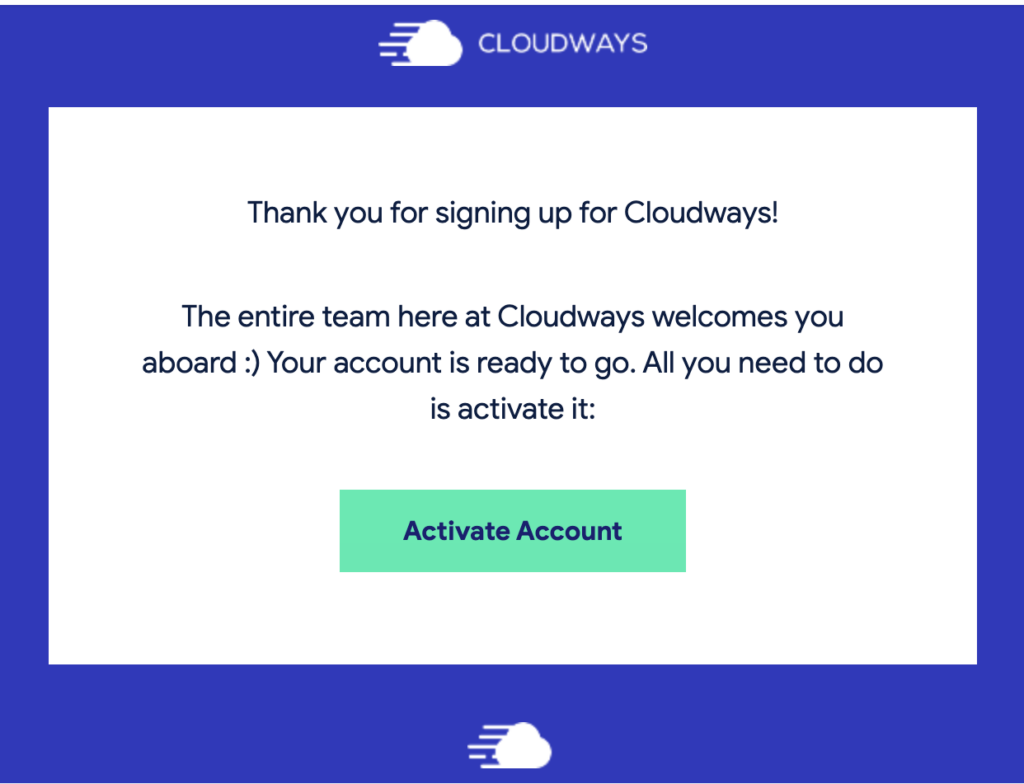
2. Once you sign up, Cloudways will send you an email to verify your account. Click ACTIVATE ACCOUNT in the email to activate your account:
3. Once your account has been activated, you will be redirected back to Cloudways. Follow the prompts to walk through the setup:
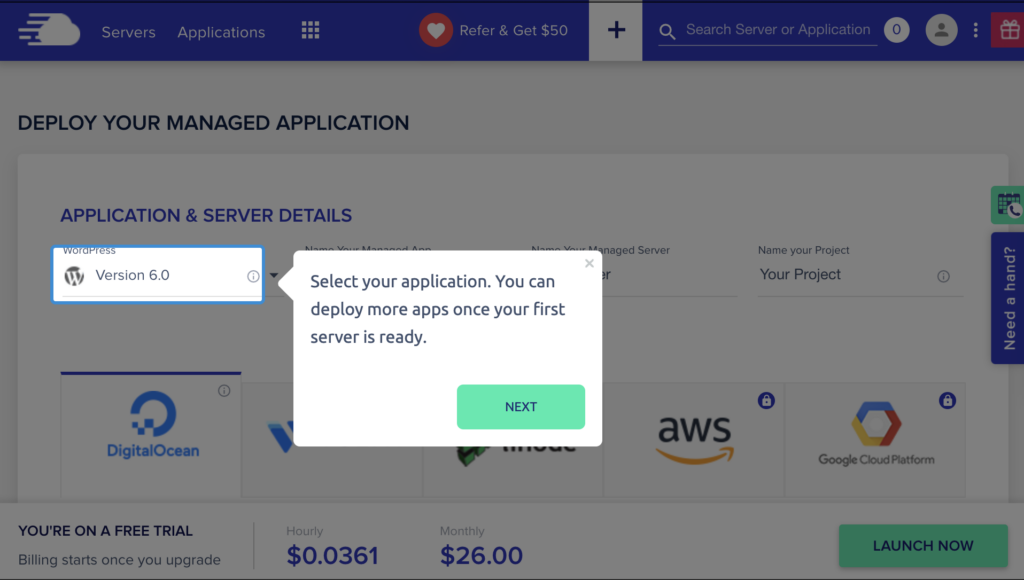
Complete the following details on the Deploy Your Managed Application page (shown above):
- Enter your server details.
- Select a server (DigitalOcean, VULTR or linode are available during the free trial).
- Choose your server size. Note that you can always scale your server size at any time.
- Select your server location from the list.
- Click LAUNCH NOW.
4. When you launch your server on Cloudways, WordPress is automatically installed for you. Click www and select your application (in this example we named it JFM Cloudways):

This will bring up the Application Management screen where you can launch your brand new WordPress site.
5. Click the URL under ADMIN PANEL (note your username and password will be used to login to your WordPress Admin Dashboard):
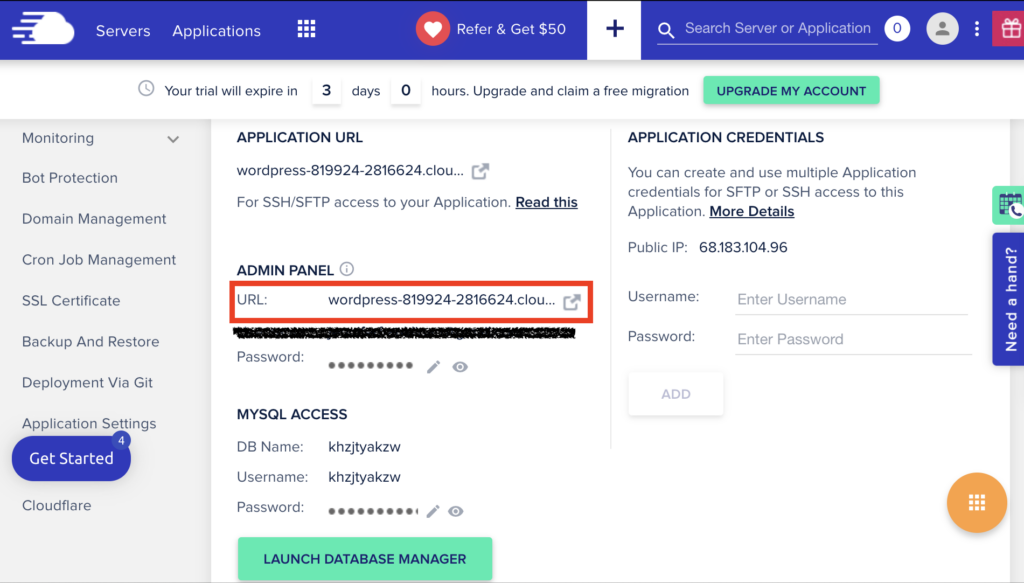
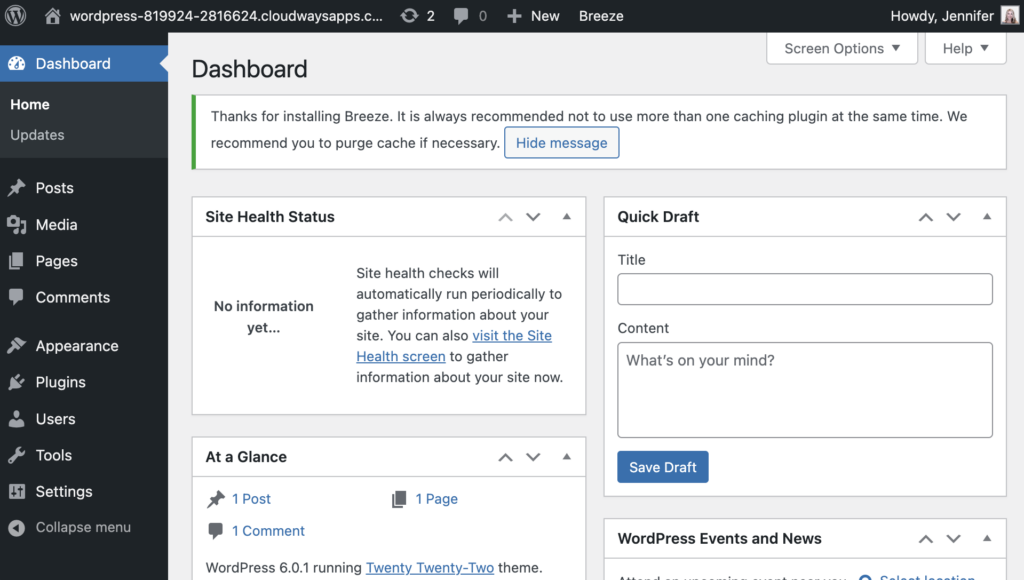
6. Enter your username and password to login to your WordPress Dashboard. It looks like this:
Now that you have your web hosting and domain setup, it’s time to choose and install a WordPress theme.
Step 3: Choose and Install a WordPress Theme
The next step in building your photography website is to choose a WordPress theme. There are thousands of WordPress themes available, and searching for the best photography WordPress theme will drive any sane person crazy.
The first time I installed WordPress, I remember spending hours, days, weeks and possibly even months trying to find the perfect WordPress theme.
In this tutorial, we are going to keep it simple and use Astra:

Astra is the best WordPress theme for photography websites. It’s free, fast loading, and includes pre-designed photography website templates that you can import in just a few clicks. All you have to do is customize the content with your own and you’ll have your photography website set up in no time.
If you signed up using the Cloudways link within this article, Astra PRO will be automatically installed for you and you can skip to the next step.
How to Install Astra on Your WordPress Site:
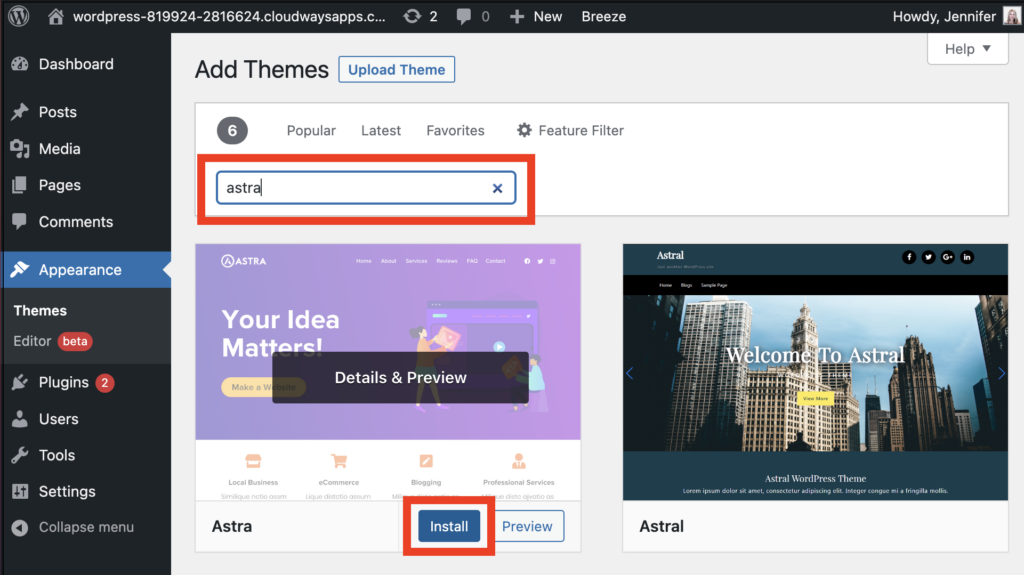
1. From your WordPress dashboard, navigate to APPEARANCE > THEMES and click ADD NEW:
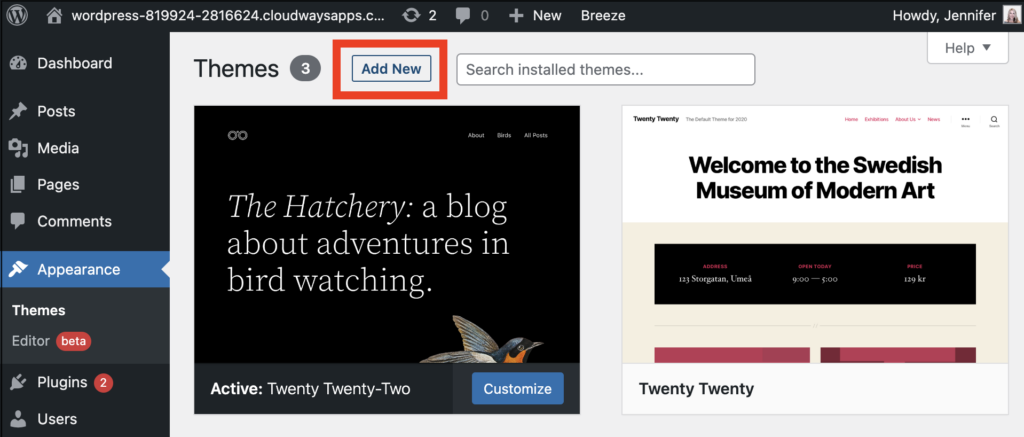
2. In the search box, type Astra. Hover over the Astra theme image and click INSTALL. Then, click ACTIVATE:
RELATED: It is also a good idea to install the Astra child theme. For step by step instructions, check out this article Create and Install Astra Child Theme (Do I Need It?).
Once Astra is installed and activated, you can have some fun importing your photography site!
Step 4: Import Your Photography Site with Starter Templates
Astra makes it easy to customize your photography site with pre-designed website templates found in the Astra Starter Templates plugin. This plugin gives you access to hundreds of pre-made full website templates that you can install in just a few minutes.
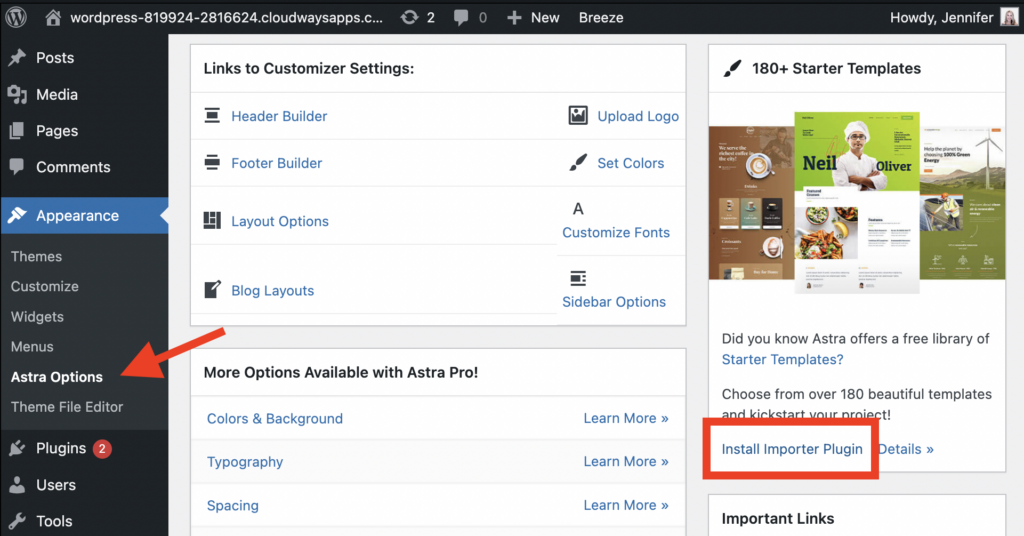
1. To get started, navigate to APPEARANCE > ASTRA OPTIONS. On the right hand side, click Install Importer Plugin:
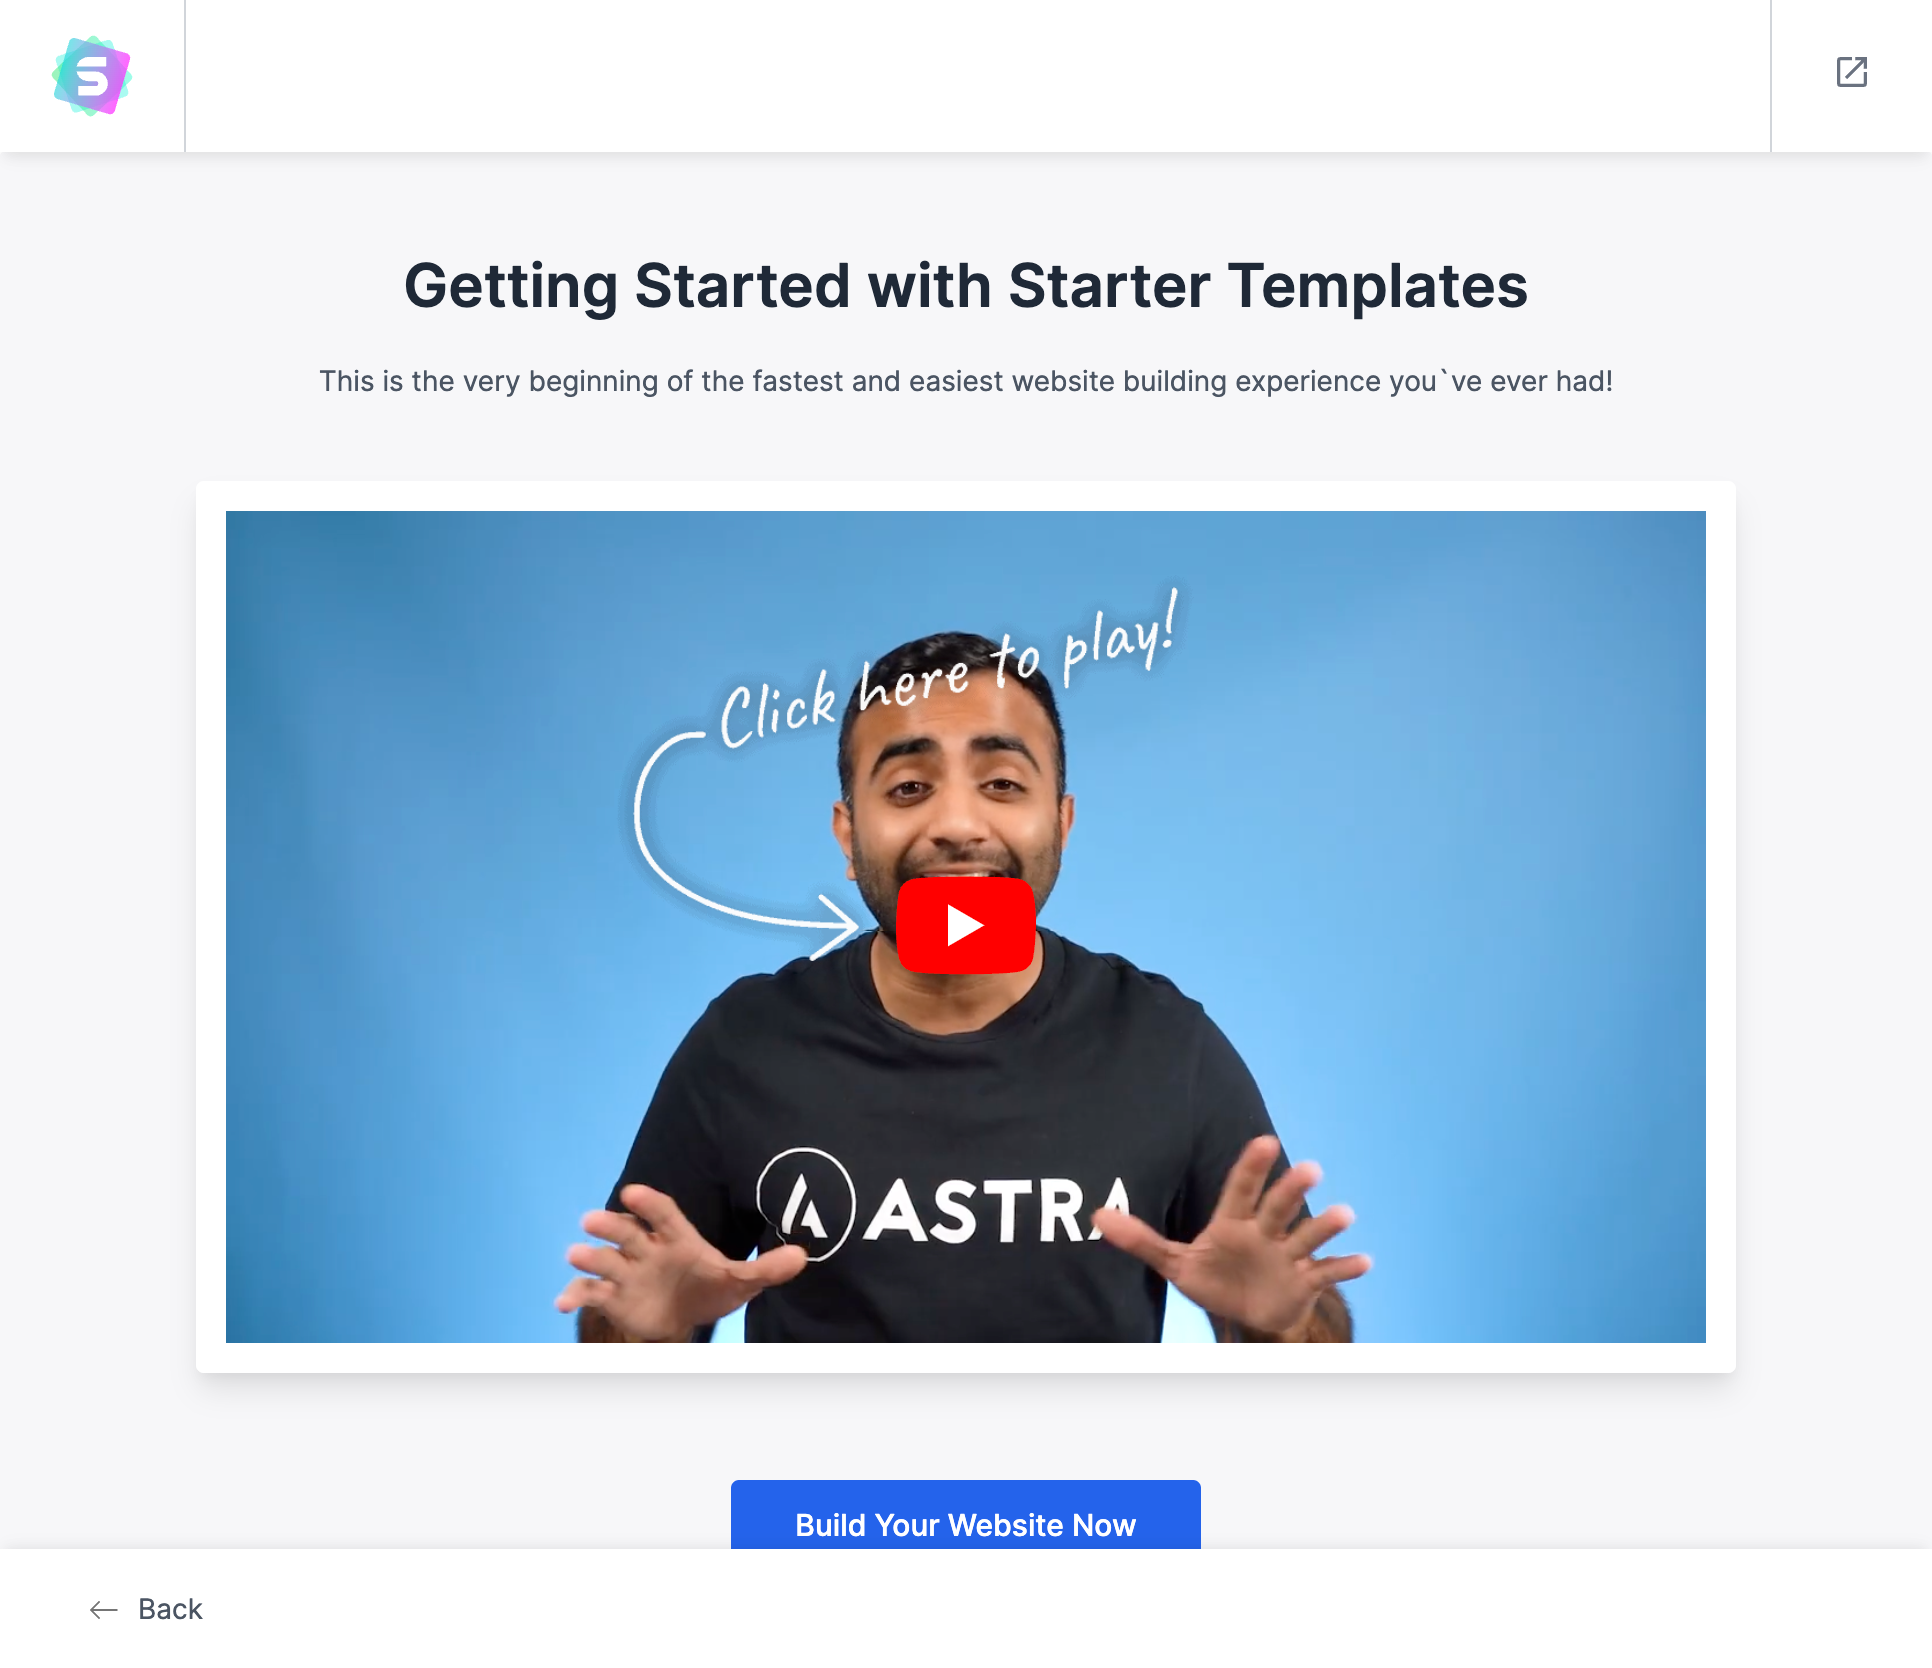
In the next window, you can watch a quick welcome video. Click BUILD YOUR WEBSITE NOW to get started:
2. On the next screen, you will choose a page builder. This controls how you edit the content area of your website. In this tutorial, I will choose Beaver Builder:
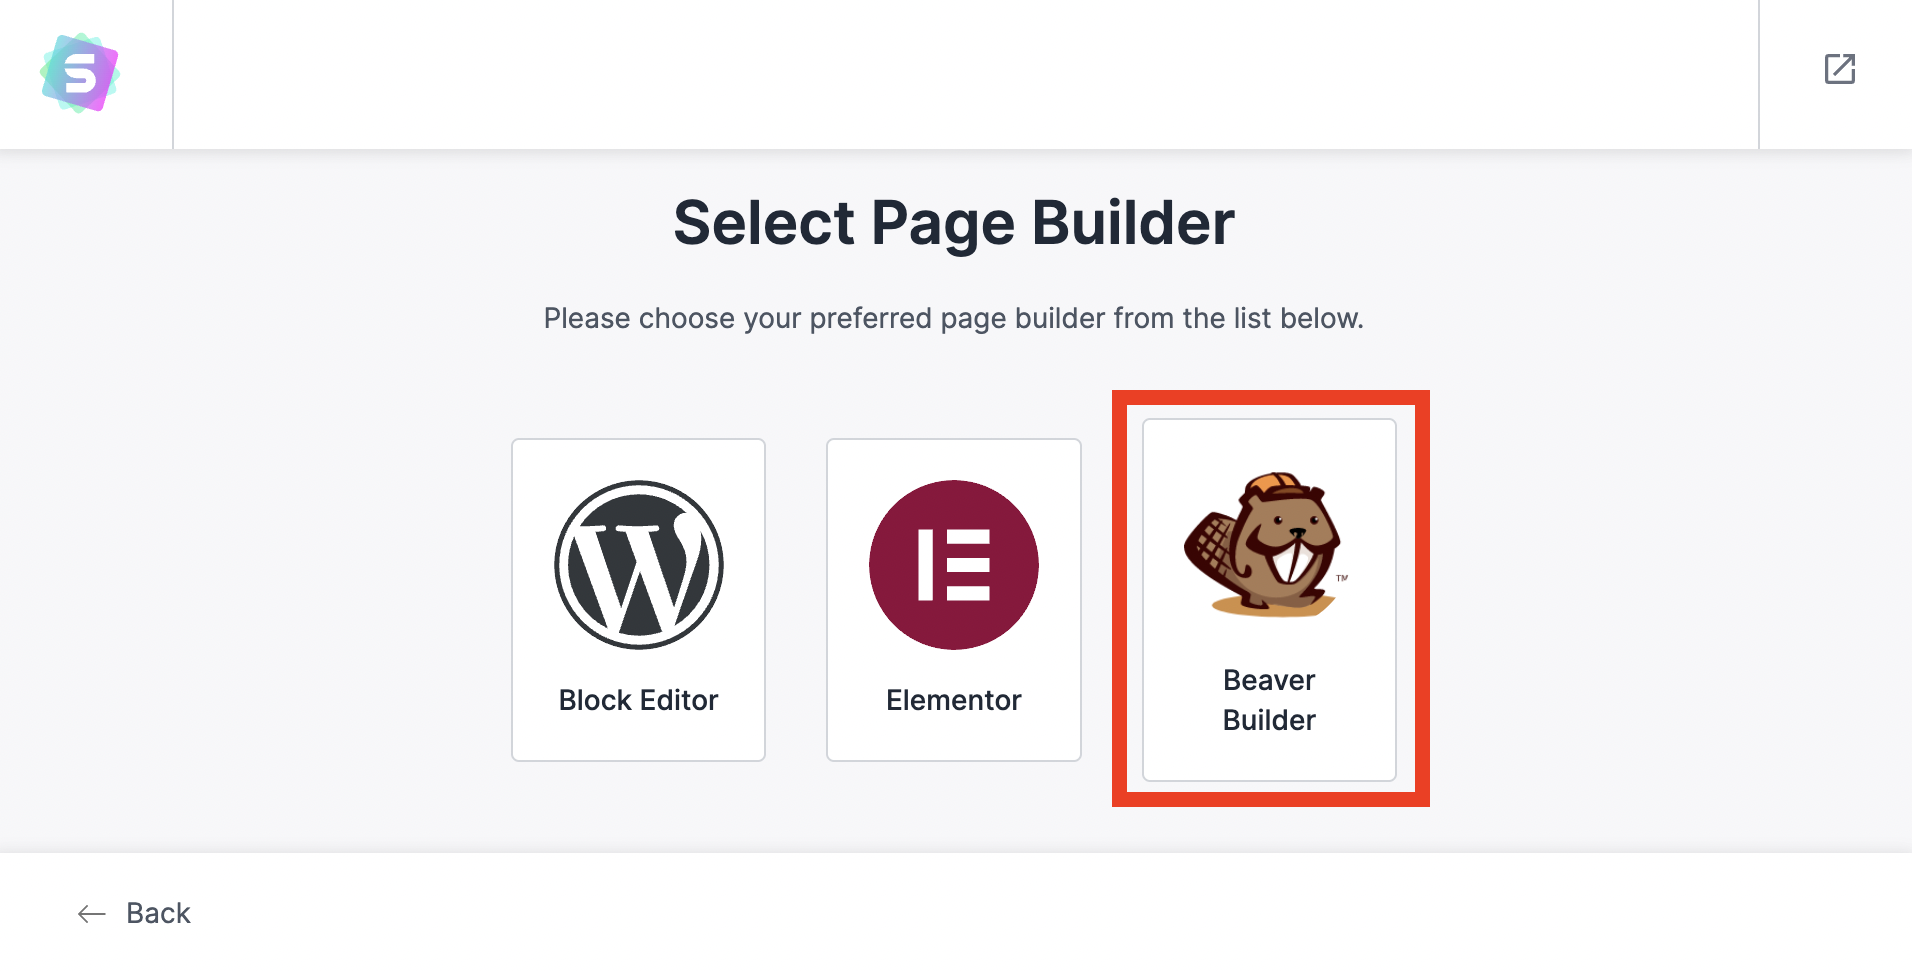
Beaver Builder is my favorite page builder for beginners. It is reliable, user-friendly, and has a helpful support team if you get stuck and need help.
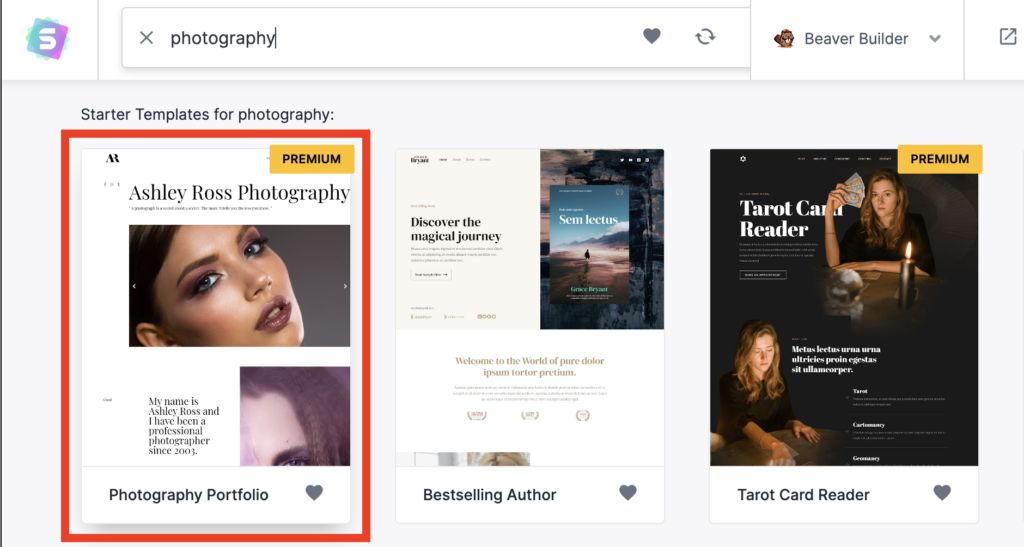
3. Now you can search through the Beaver Builder starter templates. When you find a design that you like, click on it:
4. In the next window, you will preview your website and upload your logo. Be sure your logo is sized to the suggested 180 x 60 pixels; otherwise, it might not look right.
RECOMMENDED LOGO MAKER: My favorite free web based design tool for beginners is Canva. For entrepreneurs, Canva PRO is worth it and starts at $12.99 per month.
If you don’t have a logo yet, that’s ok, you can always upload it later. Click SKIP & CONTINUE:
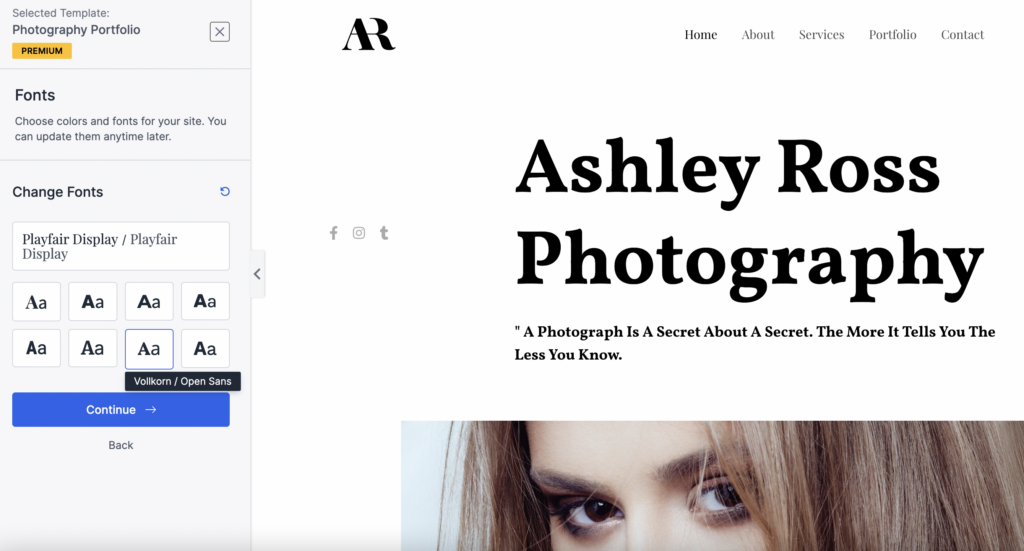
5. On the next page, you can try different font combinations until you find one you like. Choose your favorite and click CONTINUE:
Note that the Starter Template we chose for our photography website is marked PREMIUM. This means that it is only available as an upgrade to Astra’s Essential or Growth Bundles.
Click UNLOCK ACCESS to continue with this selection:
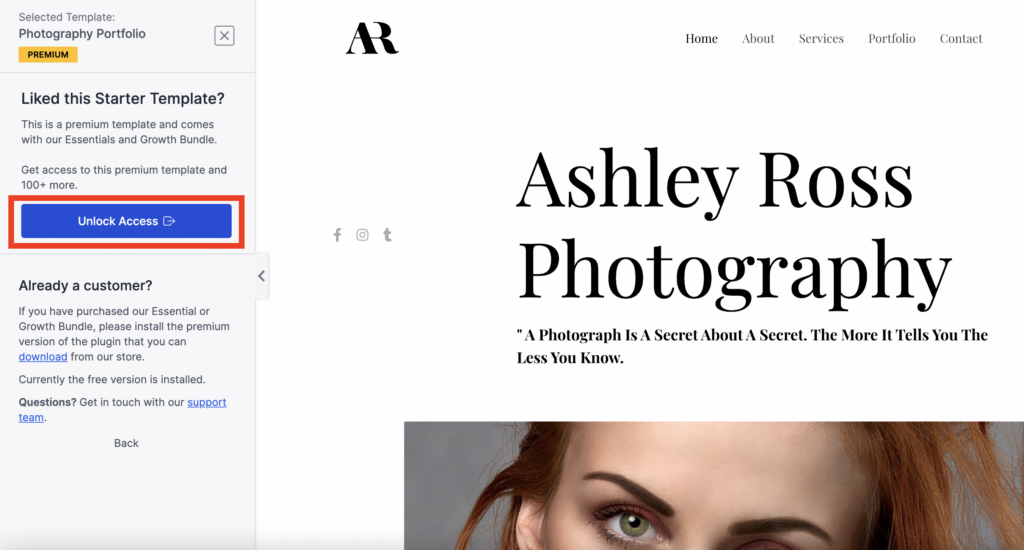
If you don’t want to upgrade right now, don’t worry, you can choose any of the other non-premium templates to design your website.
When choosing a Beaver Builder Starter template, I have found it helps to focus on the overall design and less on the stated purpose of the website template. For example, if you love the “Bestselling Author” website template, you can choose it as the starting point for your photography website.
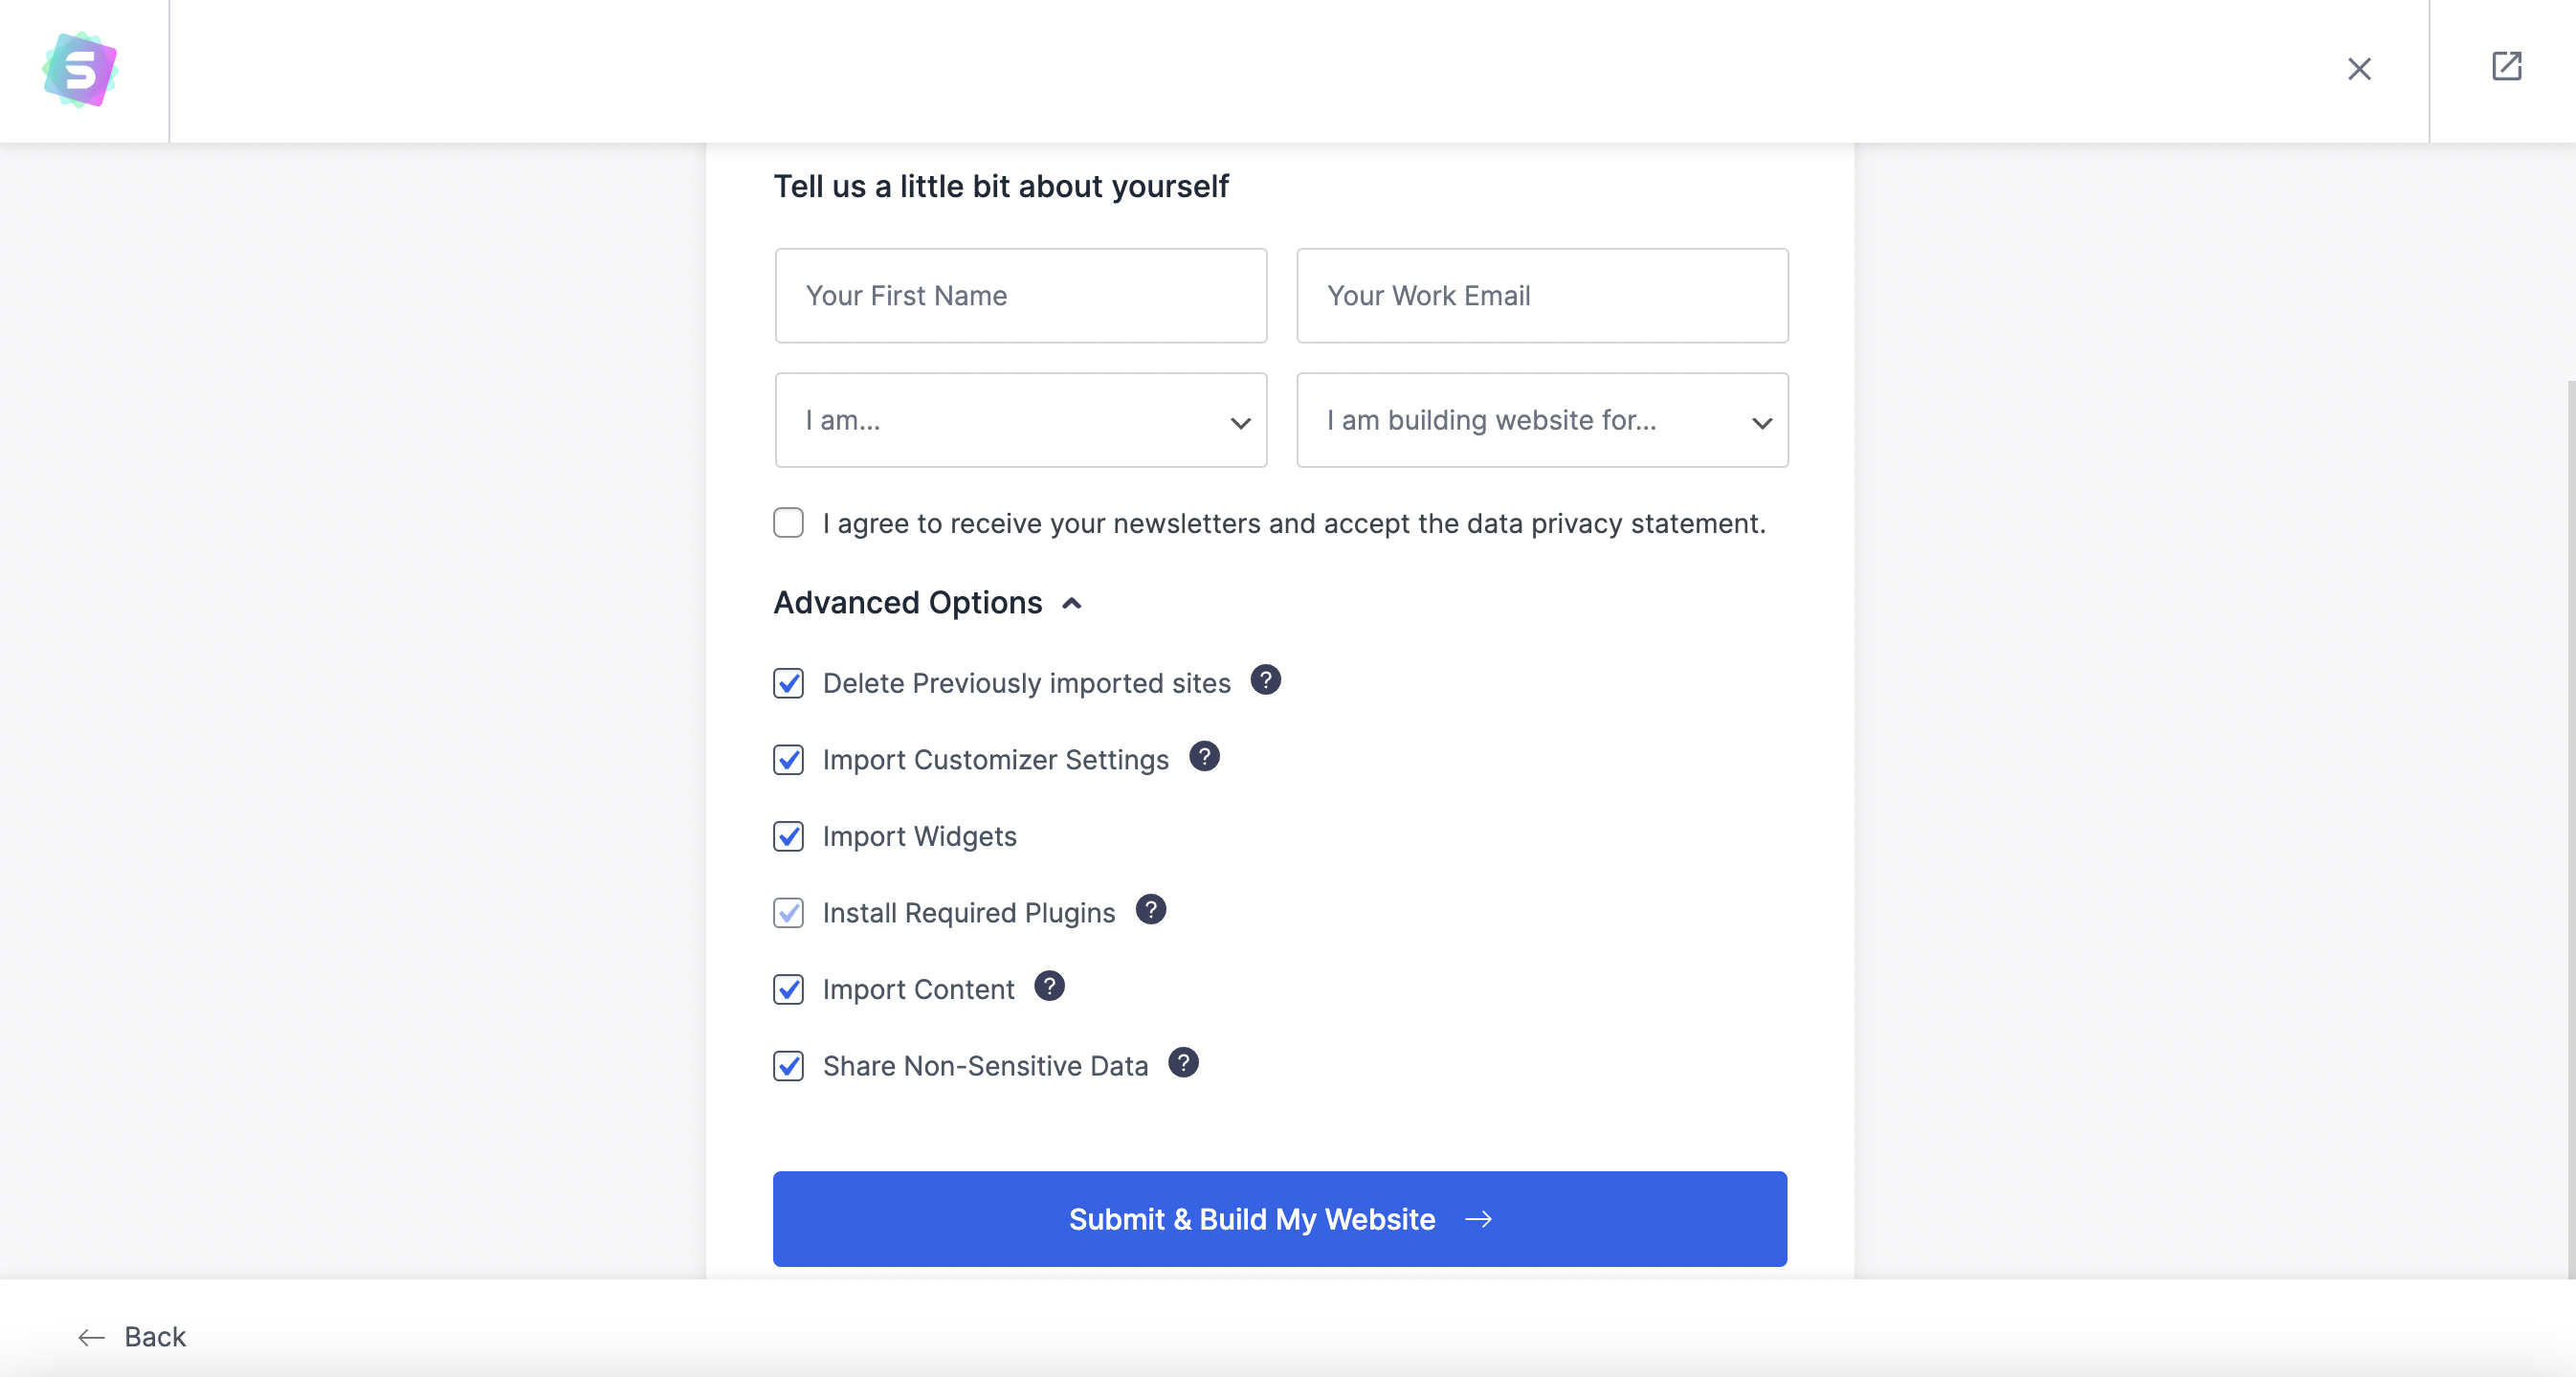
6. On the last page of the setup wizard, review and check the boxes below the Advanced Options section:
- Delete Previously imported sites – WARNING: Selecting this option will delete all data from the previous import.
- Import Customizer Settings – Starter Templates customizer serves global settings that give uniform design to the website. Choosing this option will override your current customizer settings.
- Import Widgets – imports widgets used to build the site
- Install Required Plugins – imports required plugins used to power the site
- Import Content – Selecting this option will import dummy pages, posts, images, and menus. If you do not want to import dummy content, uncheck this option.
- Share Non-Sensitive Data – Share non-sensitive data with the plugin developer.
Then, click SUBMIT & BUILD MY SITE:
In just a few more seconds, by the magic of technology, your photography website will be built for you.
7. Click VIEW YOUR WEBSITE to take a look:

Step 5: Customize your Photography Website
If you chose to Import Customizer Settings, then your website will look like the preview template. Astra’s customizer settings provide you with the easiest way to customize your website and make it stand out.
RELATED: For more information, I think you will find this article helpful How to Customize Astra Theme Walkthrough.
The Astra theme customizer is located in your WordPress dashboard at APPEARANCE > CUSTOMIZE. Alternatively, from the front end of your site you can click CUSTOMIZE in the top navigation. The customizer will open up along the left hand side of the page:
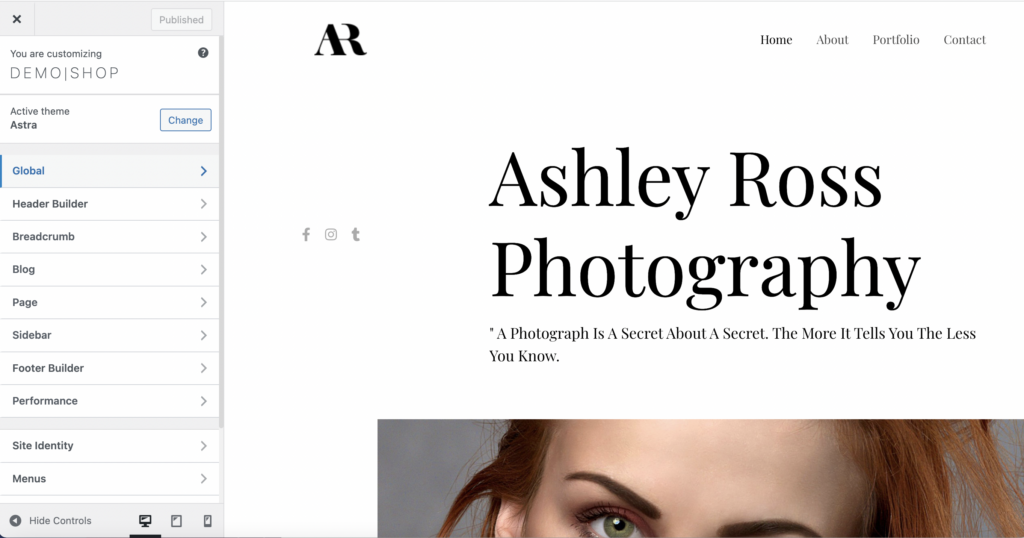
I would encourage you to explore each of the different tabs and see all of the different customization options available to you:
| Astra Customizer Setting | What Does it Do? |
|---|---|
| Global | Global customization has four different options: Typography, Colors, Container and Buttons. |
| Header Builder | Customize the site logo, primary menu and transparent menu options. |
| Breadcrumbs | Enable breadcrumbs and manage the width and position. |
| Blog | Customize the appearance of Archive and Single Post pages. |
| Page | Set the Page Container Layout and choose how Sidebars are displayed. |
| Footer Builder | Customize the footer layout, elements and design. |
| Site Identity | Upload a Site Icon. |
| Menus | Create and manage menus on your site. |
| Widgets | View and edit the widget areas of your site. |
| Homepage Settings | Choose what’s displayed on the homepage of your site: Your latest posts or AStatic page. |
| Additional CSS | Add your own CSS code to customize the appearance and layout of your site. |
You will be able to live preview any changes as they take place. Don’t forget to click PUBLISH at the top to save any changes that you make.
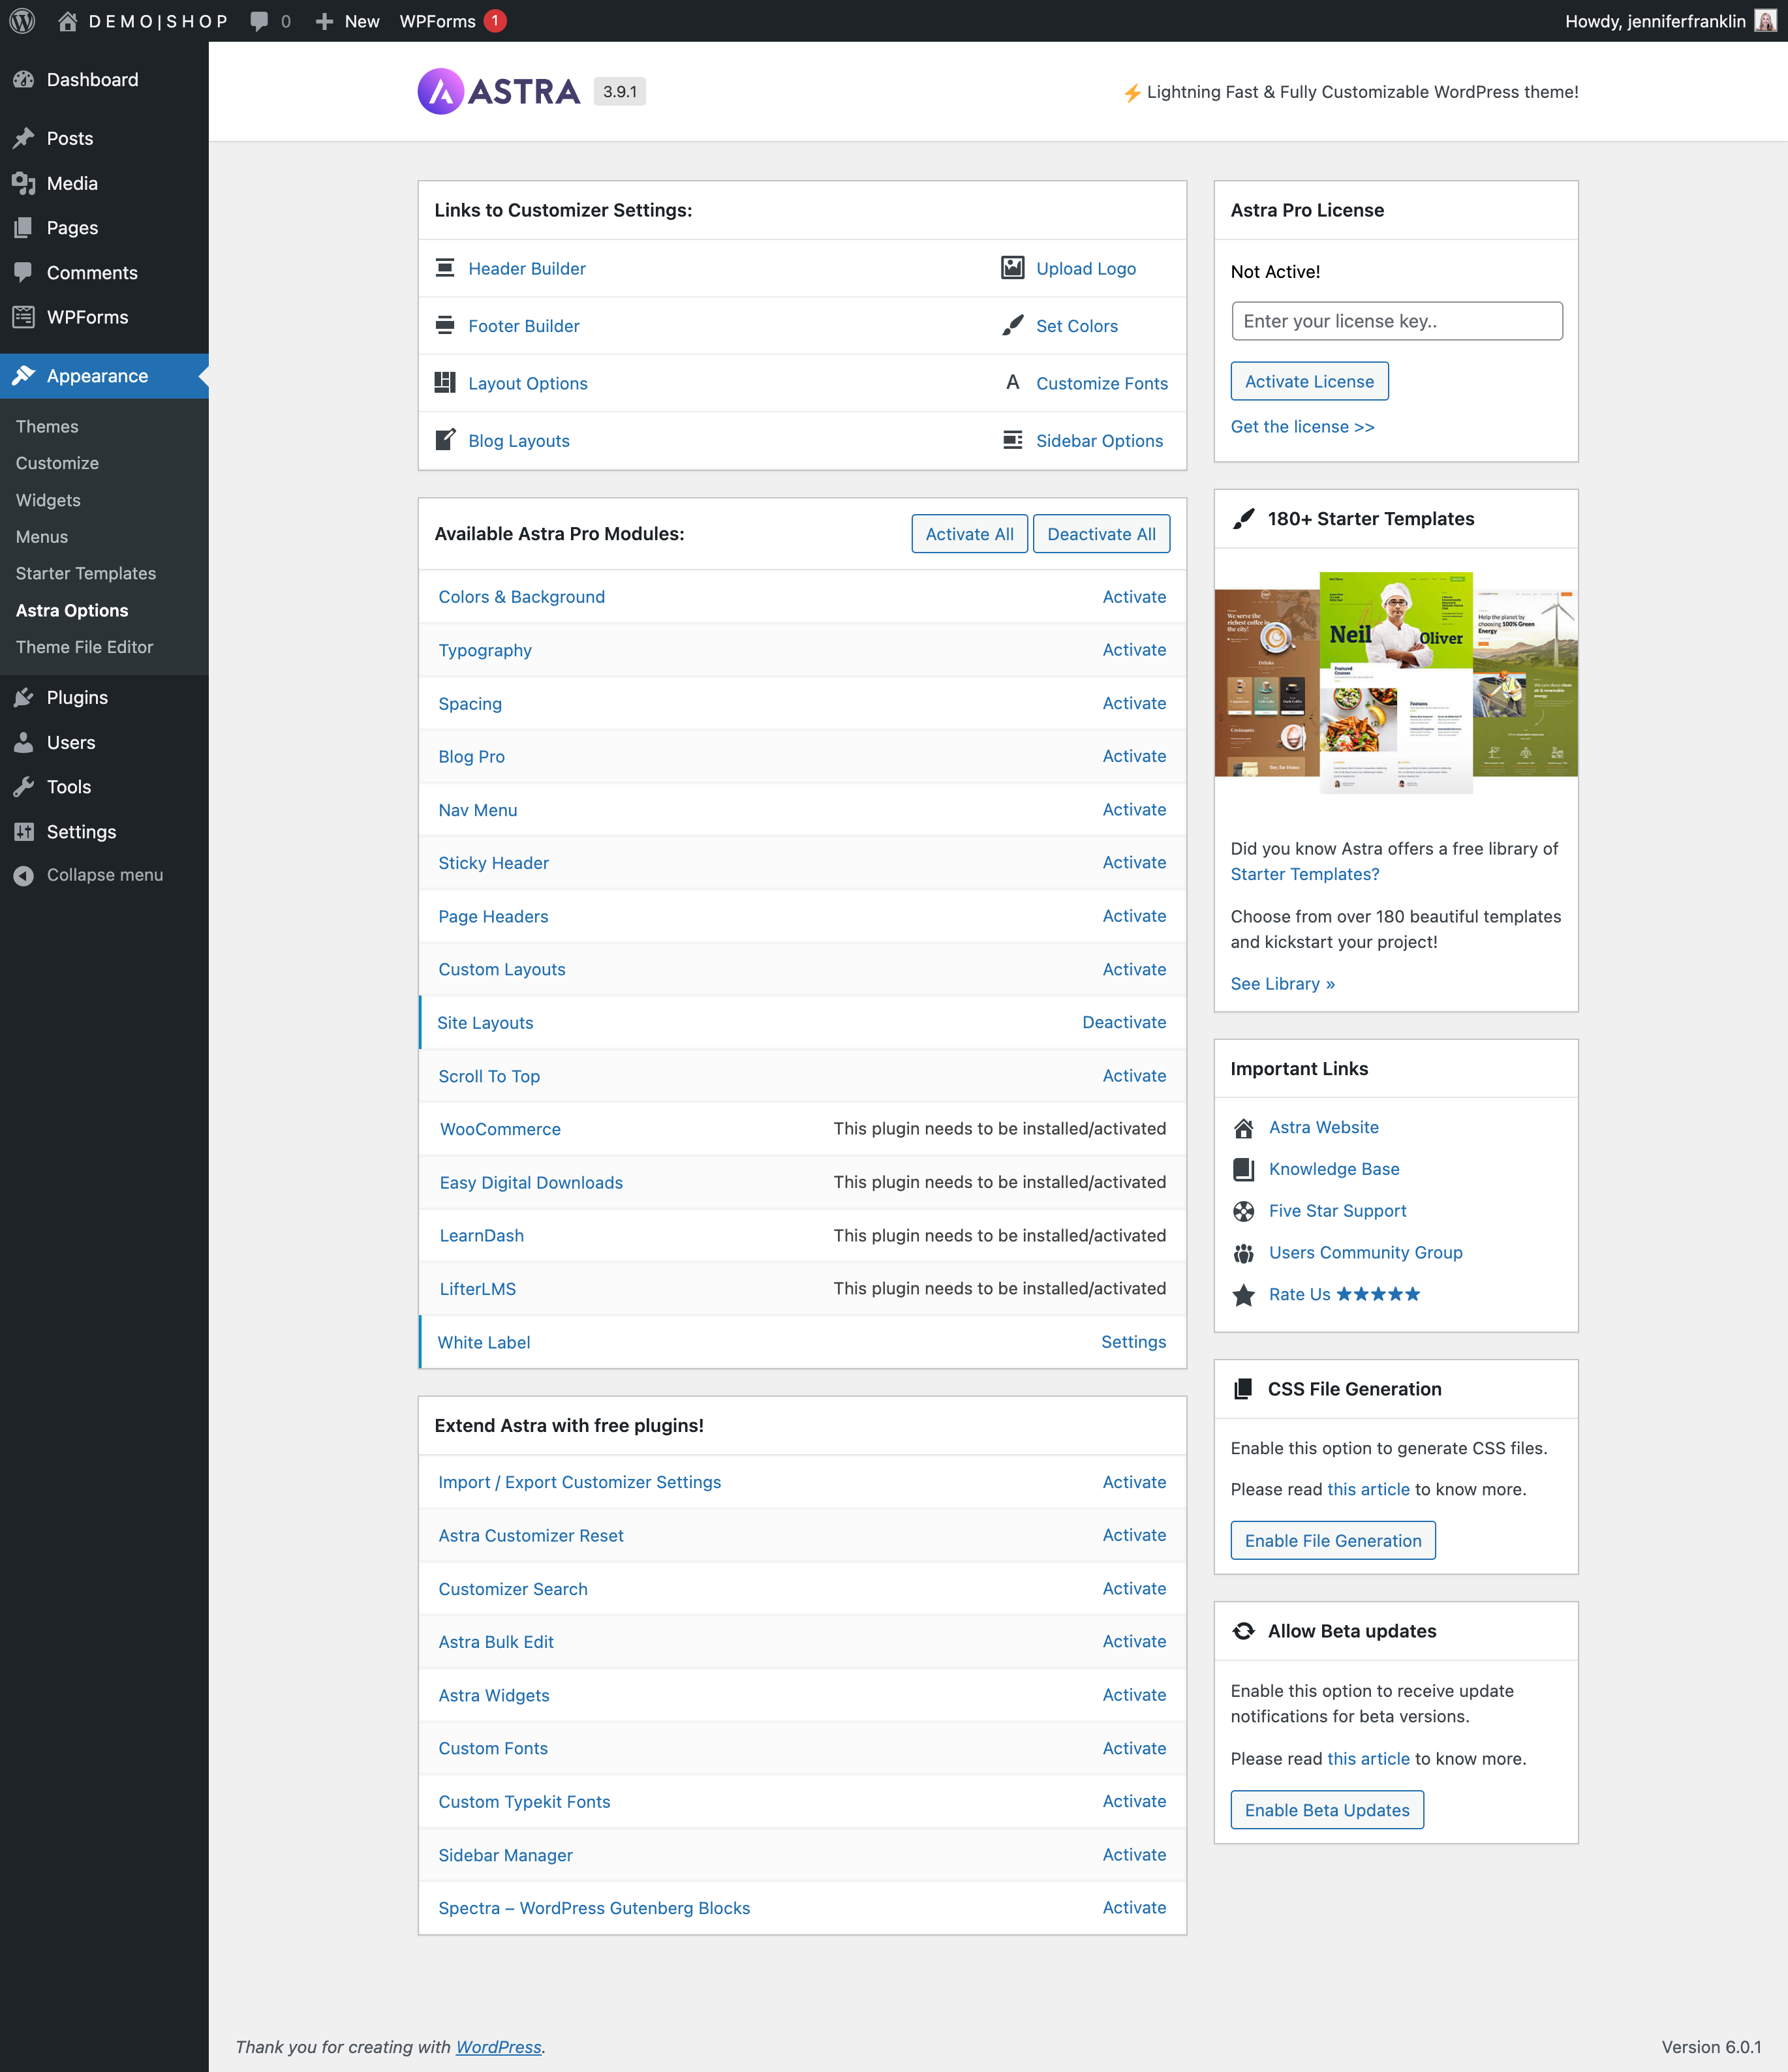
Additionally, Astra has more features that you can unlock to enhance your photography website. Navigate back to the WordPress dashboard. Click APPEARANCE > ASTRA OPTIONS to activate or deactivate each one individually:
In the next step, you will learn how to edit the pages and add your own images and copy.
Step 6: Edit your Website Pages
By now your WordPress photography site is really starting to take shape, and you are ready to edit your website pages.
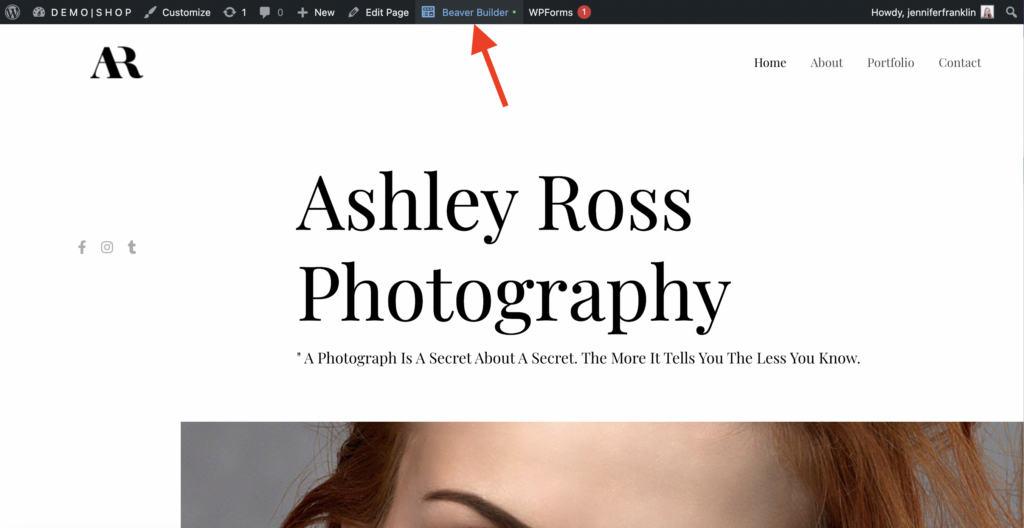
If you chose the Beaver Builder page builder, then you will be able to edit your WordPress pages on the front end of your site quickly and easily without writing any code. Click BEAVER BUILDER in the top navigation:
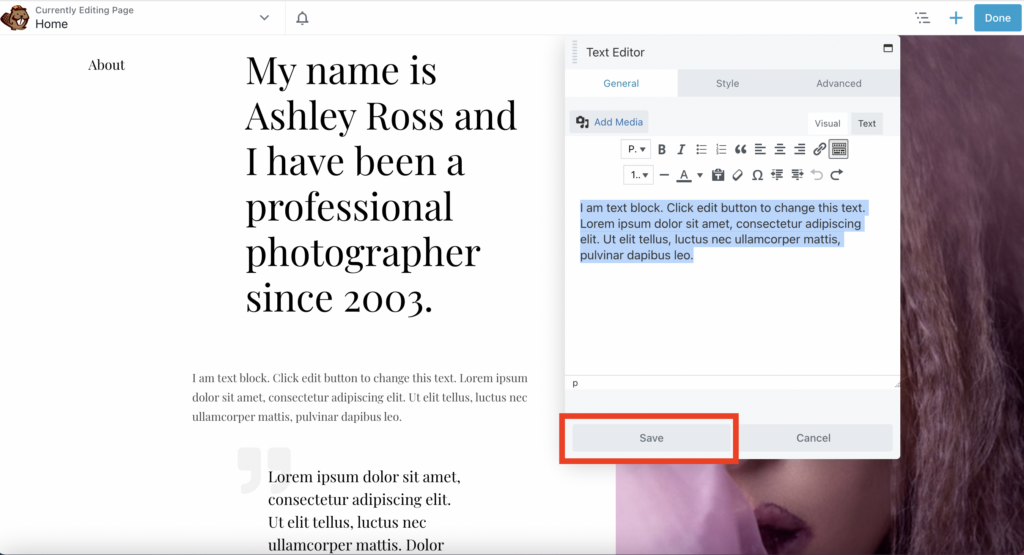
This will launch the Beaver Builder editor. To make changes, hover over the element you want to update and click on it.
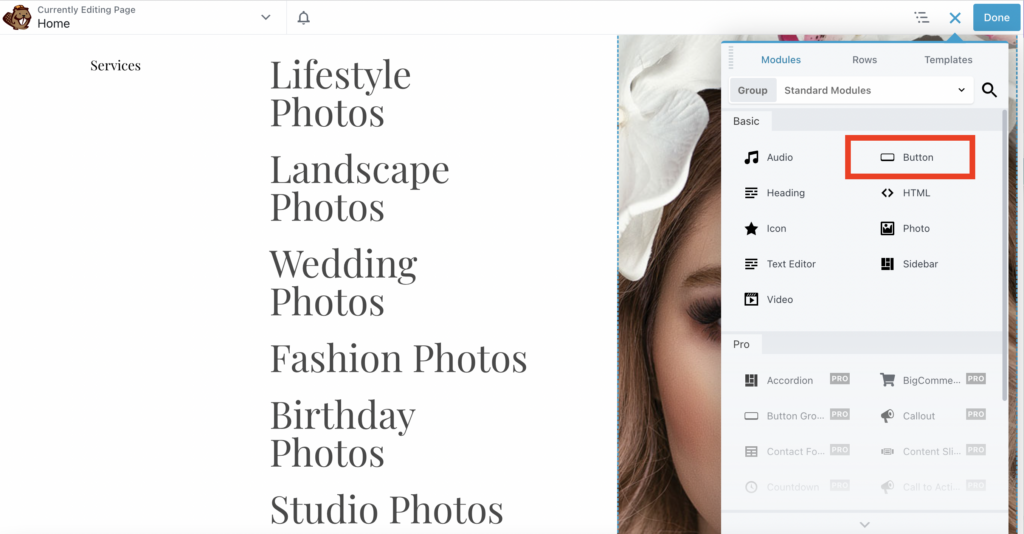
For example, to customize the copy, simply click on the text editor module. In the popup, change the text so that it makes sense for your business. Click SAVE to save your changes:
To add a new module, click on the blue PLUS icon in the upper right top navigation to open up the content panel. Then, click and drag one of the module onto the page. In this example, a BUTTON module:
RELATED: For additional training on getting started with Beaver Builder, I think you might like this video playlist:
Once you’re happy with your page design, click DONE and PUBLISH to save your changes. Then, you can edit the other pages on your site such as the About and Contact pages.
Step 7: Launch Your Photography Website (Go Live!)
Congratulations! Now, it’s time to take your site live with your own domain. This involves the following steps:
- Add your domain to the Cloudways Platform.
- Point your domain to Cloudways using the DNS records.
- Secure your site using HTTPS.
RELATED: For more information on how to launch your photography website, I recommend reading How do I Take My Website Live on Cloudways?
Step 8: Upgrade Your Photography Website with Plugins (Optional)
When you installed your Astra Starter Template, it also installed a number of required plugins. Go to PLUGINS > INSTALLED PLUGINS to see them. For example, with the installation of the premium Photography starter templete, the following plugins were added to the site automatically:
- Astra Pro – This plugin is an add-on for the Astra WordPress Theme. It offers premium features & functionalities that enhance your theming experience at next level.
- Beaver Builder Plugin (Lite Version) – A drag and drop frontend WordPress page builder plugin that works with almost any theme.
- Ultimate Addons for Beaver Builder – Ultimate Addons is a premium extension for Beaver Builder that adds 70+ modules, 250+ templates and works on top of any Beaver Builder Package.
- WPForms Lite – Beginner friendly WordPress contact form plugin. Use our Drag & Drop form builder to create your WordPress forms.
WordPress plugins extend the functionality of your photography website so that you can grow your business. Following are some of my favorite WordPress plugins for your photography website:
| Plugin Name | Plugin Type | What Does It Do? | Starting Price |
|---|---|---|---|
| Start Booking | WordPress Booking Plugin | Start Booking plugin helps photographers manage customers, book more appointments, and sell their services. | FREE |
| Imagely NextGEN Gallery | Photo Gallery Plugin | Imagely’s NextGEN Gallery is the best WordPress gallery plugin for photographers to manage, display, proof, and sell photos online | $49 (annual) |
| WP Portfolio | Portfolio Builder Plugin | WP Portfolio is the most flexible plugin that displays beautiful responsive portfolios that look good on all devices. | $49 (annual) |
| Smash Balloon | Social Media Feed Plugin | Smash Balloon offers 5 fully customizable social media feed plugins for WordPress. Photographers love sharing their beautiful Instagram photos with their website visitors. | $49 (annual) |
| WooCommerce Photography | WooCommerce Plugin | WooCommerce Photography helps professional photographers streamline their processes and sell their images online. | $79 (annual) |
Start Booking – WordPress Booking Plugin
Start Booking offers the best WordPress booking plugin for photographers who want easy online scheduling. The setup is easy and comes packed with powerful features. Get started for free and upgrade any time for $25 per month.

Imagely NextGEN – Photo Gallery Plugin
Imagely’s NextGEN Gallery is the most popular WordPress photo gallery plugin for photographers to manage, display, proof, and sell photos like a pro. Pricing starts at $49. When you upgrade to the PRO plan, you get even more features like automated print fulfillment.
WP Portfolio – Portfolio builder plugin
WP Portfolio is a premium WordPress portfolio plugin made for photographers. It was created by Brainstorm Force, the developers of the Astra WordPress theme, and comes bundled with their Esential and Growth Bundles. Or you can purchase the stand alone plugin for $49.
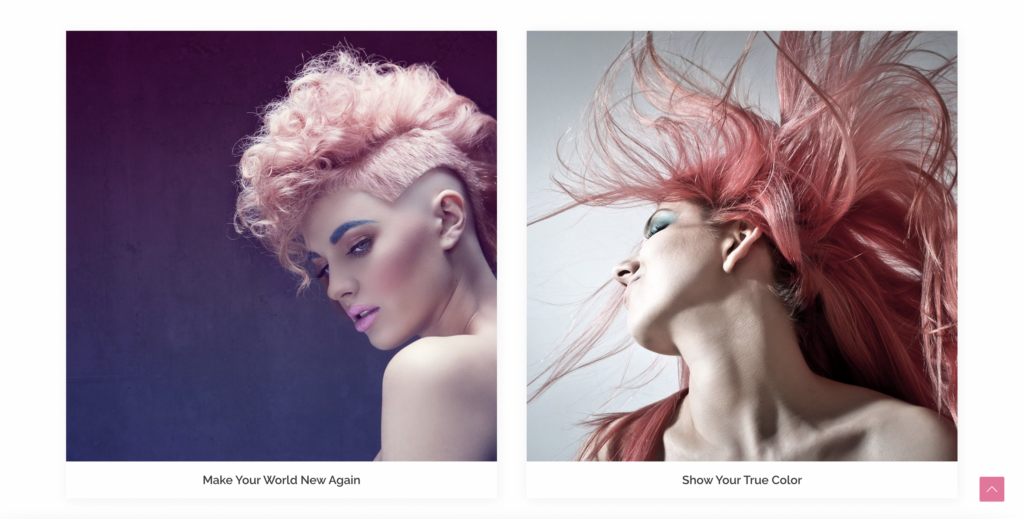
Just like the Astra Starter Templates, the WP Portfolio plugin offers ready-to-use website templates for your photography portfolio. Upload the pictures to the portfolio and display them anywhere on your website:
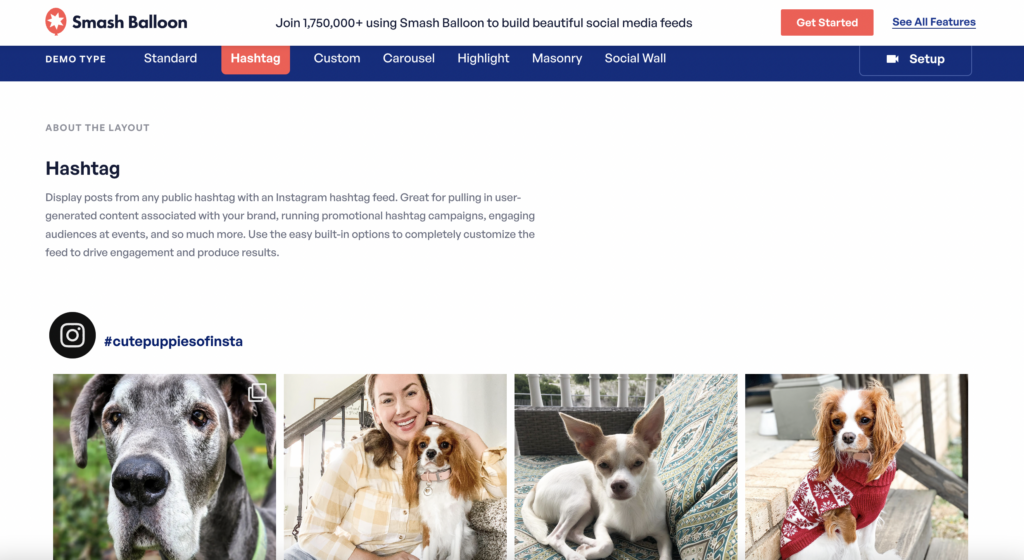
Smash Balloon – Instagram Feed Plugin
Smash Balloon is the best social media feed plugin for photographers to display social media content on your WordPress website. Create a beautiful custom Instagram Feed to share your most recent posts with your website visitors.
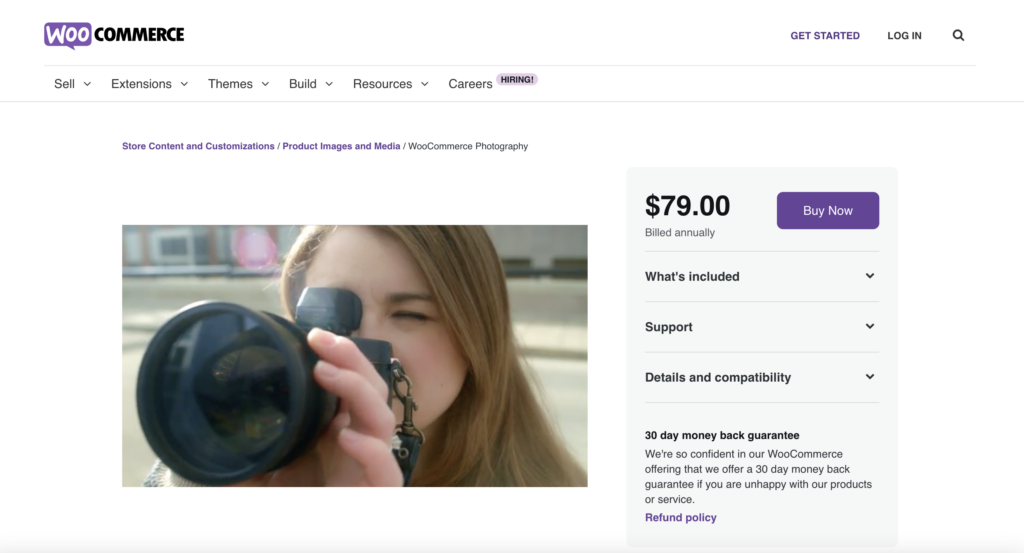
WooCommerce Photography – WooCommerce Plugin
The WooCommerce Photography plugin allows photographers to sell photos beautifully. The bulk uploader tool makes it easy to upload multiple photographs at once. Professional photographers love the ability to organize and sell a collection of photos that are part of an event such as a wedding, school function, or tournament. Customers love how easy it is to browse collections and choose the photos they want to purchase.
Related Questions
Is WordPress good for photography websites?
WordPress is the best choice for creating photography websites. The Content Management System (CMS) is customizable and has thousands of plugins to choofor additional functionality: booking calendars, galleries, portfolios, online shops and so much more.
What is a photography website?
A photography website is a must have for photographers. A well designed photography site showcases your best work, highlights your accomplishments and makes it easy for customers to book an appointment or purchase prints.
How do I sell photos on WordPress online?
WordPress makes it easy to sell photos online. Imagely’s NextGEN Gallery and WooCommerce Photography are two popular WordPress plugins used by photographers to manage and sell photographs on the internet.
What is the best WordPress theme for photographers?
Astra is the best WordPress theme for photographers. It’s fast loading and includes hundreds of pre-designed website templates that you can import in just a few clicks. And now you can get Astra PRO free for a year when you sign up for Cloudways Managed WordPress hosting.